Pulling from Upstream
Table of contents
Key Idea
When working with a forked repository, it is important to keep your fork up to date with the original repository. This is done by pulling changes from the original repository into your fork. The steps can be a little tricky the first time you do them.
Don’t panic, just follow this guide!
Step 1) Sync Your Remote
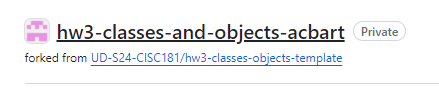
Visit your remote repository for the assignment on the Github web interface. This should have your name in the repository title, like “UD-S24-CISC181/hw3-classes-and-objects-acbart”. If there are upstream changes to sync into your repository, you will see some message like the following:

If you have pushed your own changes, it will say that you have “N commits ahead of”. This is not a problem, and just means that you have done some work.
If there are upstream changes to pull, it will say that you have “N commits behind”.
You might have both, but you only have to do something if you “commits behind” , which should give you access to a “Sync fork” button.
Click the “Sync fork” button to reveal further options. If that button is not available, then congratulations! You do not have anything to pull in and you are up-to-date. You can stop reading this guide.
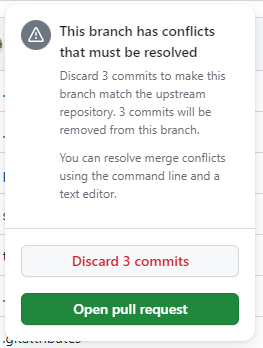
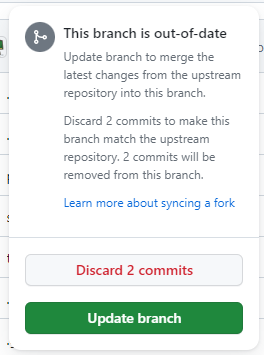
If the changes are easy to merge then it will offer you the ability to “Update branch” and you can go to Step 3. If it offers “Open pull request”, then things are a little bit trickier and you need to go to Step 2.
| Merge Conflicts | No Merge Conflicts |
|---|---|
| If you get the option to "Open pull request" because "this branch has conflicts that must be resolved". That means you changed the files more than Git can handle automatically, and you will need to go to Step 2. | Choose to "Update branch" and that will update your remote repository. Then go to Step 3. |
|
|
|
 \
\
Step 2) Pulling Remotes Locally
Remember, if you just used “Update branch”, then you can skip over this step and go directly to Step 3.
Open up your repository in VS Code.
In the Source Control panel on the left, expand the “Remotes (1)” option.
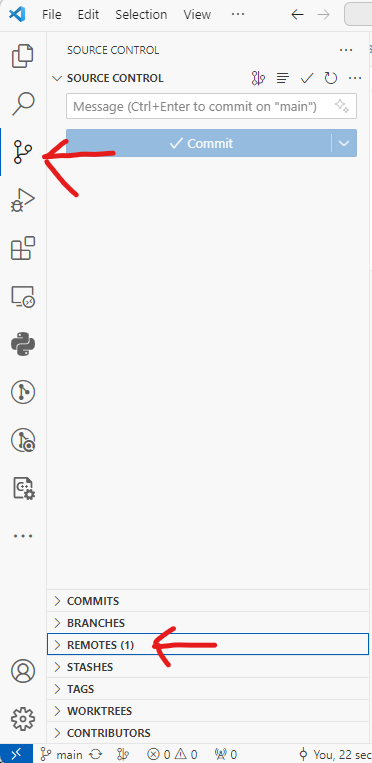
When you hover over the word “Remotes (1)”, you will see a “+” button.
Click the “+” button to add a new remote, and a window will popup.
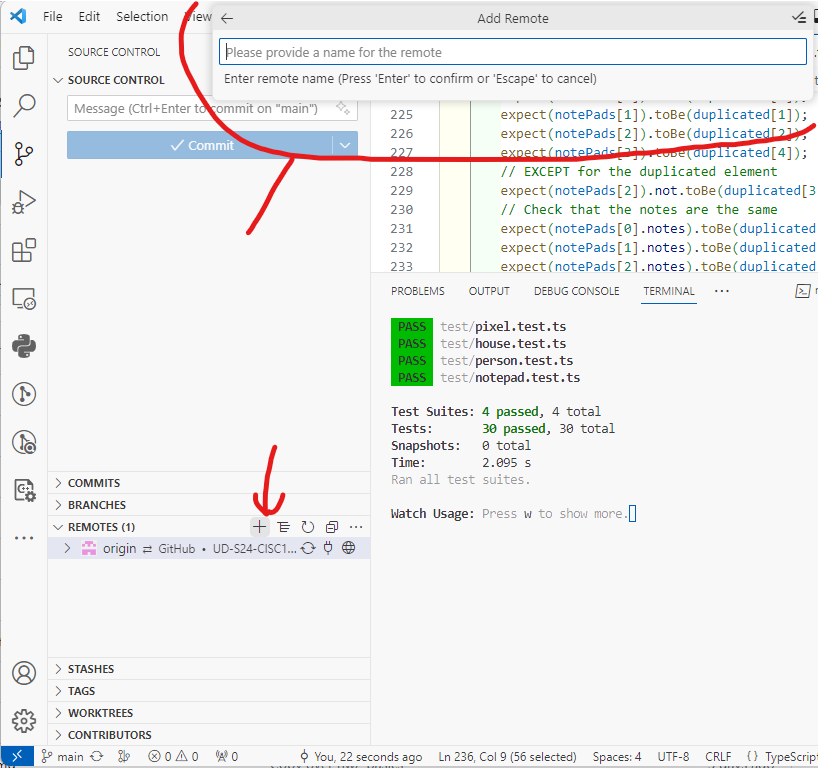
For the name of the new remote, enter “upstream” without quotes, and type enter.
The box will now ask you for the “remote URL”.

You need the URL of the original template repository (not your copy of the repository, but the original one you forked). This is where we’ve pushed the fixes to the assignment. You can access this repository by first visiting your Github repository in the browser.
Click the link after the text “forked from” (e.g., “UD-S24-CISC181/hw3-classes-objects-template”), which should have the word “template” in it. This will be near the top of the page, below the main header bar.
On this new page (the original template repository), you can click the green “<> Code” button to expand a frame with a link to the repository’s web URL, including a copy button. Click the button to copy the web link.
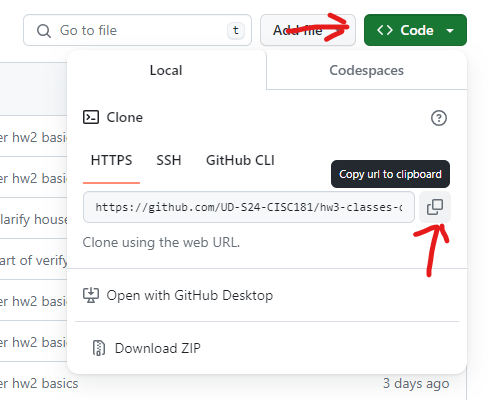
Back in VS Code, you can paste this URL into the box and type Enter.
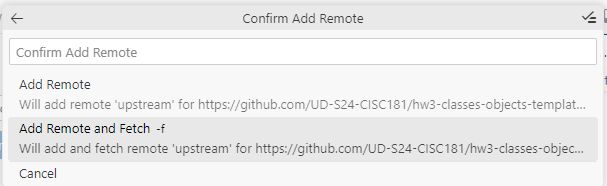
Click the “Add Remote and Fetch -f” option.
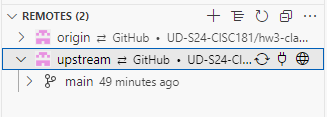
Now you have a second remote!
We’re almost done this step, you just need to merge the upstream changes into your current changes.
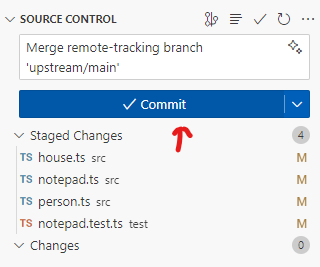
Before you merge, save all your open files.
Then, stage and commit any changed files.
Now, right click the “main” option underneath the “upstream” to expand a menu, and choose “Merge Branch into Current Branch”.
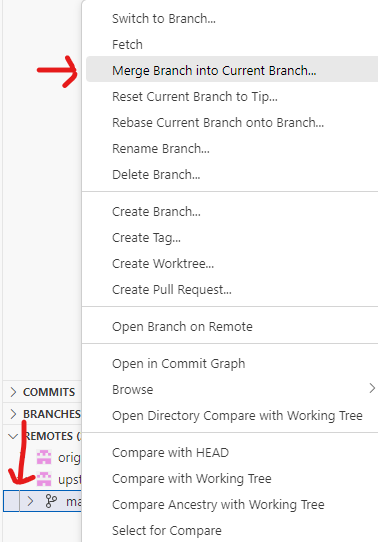
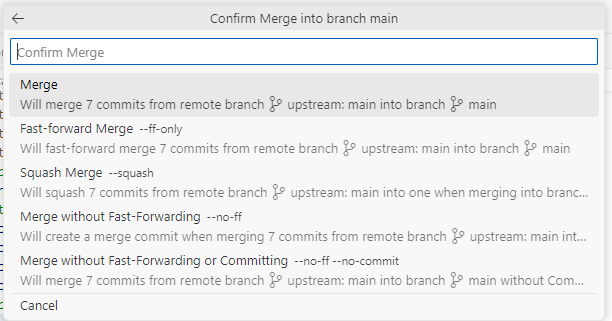
Choose the “Merge” option.
If there are merge conflicts, then go to Step 4. Otherwise, you are probably done and ready to continue working with the latest changes.
Step 3) Pulling the Local Changes
Hopefully you have now updated the repository on Github. Now, you just need to pull the latest changes.
First, save all your open files.
Then, stage and commit any changed files.
Third, click the “Sync” button to pull the new remote changes (and hopefully push your changes so far).
This last step can go wrong if your local changes have merge conflicts with the remote. For example, if you modified the same line of code that we modified, then you will get a merge conflict. Proceed to step 4.
If nothing goes wrong, then you should get the new version of the files and you are done.
Step 4) Resolving Local Merge Conflicts
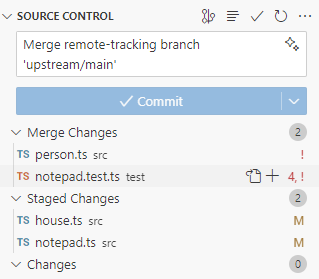
If the Source Control panel has files listed under “Merge Changes” with red exclamation marks, then you have merge conflicts to resolve.
Click on a file to be merged, and it will open in the right side.
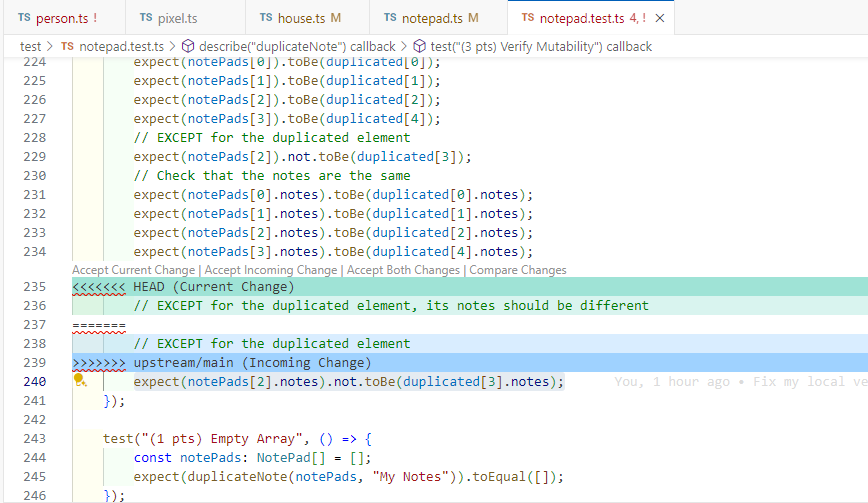
Basically, you just need to edit the file to look like the “final version” you want to have. Git will inject a bunch of <<<<, ====, and >>>> characters into your code. These indicate the modifications that Git wants to make, in order to resolve the conflict. Those need to be removed, eventually. Often, the simplest solution will be to click the “Accept Incoming Change”:
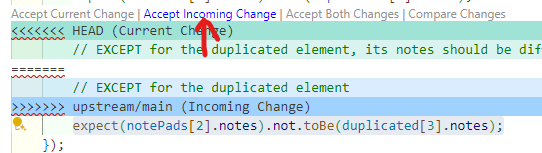
You will need to go through all of the files with red exclamation marks and resolve any conflicts. Think of it as surgery for your code. If you’re in doubt, don’t be afraid to ask for help.
When each file is resolved, then you can stage that file (using the “+” button as you usually do) and make a new commit with the existing message. If the system prompts you “are you sure you want to stage the file with merge conflicts”, then be absolutely sure that you have resolved all conflicts and that you saved the file. You should not stage a file with merge conflicts that have not been resolved!
With everything staged and committed, you can now “Sync Changes” when you are ready to push to Github. Most likely, you still have more to finish. But at least now, you are up to do date!
Still confused about merge conflicts? We recommend reading over the “Merge Conflicts” and “3-way merge editor” part of the following document for more information about resolving merge conflicts: https://code.visualstudio.com/docs/sourcecontrol/overview#_merge-conflicts
And of course, do not be afraid to seek help in office hours. The instructors are always eager to help you with issues.
Summary
When you fork a repository, you create a copy of the repository in your own account. This allows you to make changes to the repository without affecting the original repository. However, the original repository may continue to be updated with new features, bug fixes, and other changes. To keep your fork up to date with the original repository, you need to pull changes from the original repository into your fork.